Saturday, February 14, 2009

Colorful Glowing Text Effect in Photoshop

Colorful Glowing Text Effect in Photoshop

After seeing some recent Type work by Vicenç Fontanet (or, Drasik), in his recent project for “Miniblack“, I just had to give the effect a shot myself in Photoshop. It’s a wondeful little style that could easily be integrated into any dark graphic design where some upbeat text is needed.

Step 1 - Choosing a Background

For the best results with this effect, you’ll want to use a dark background. The background should have a hint of color, and should avoid from being too dark (such as pure black). Being inspired from Drasik’s work, I’ll use a dark violet (#120612).

Just to get this out of the way, as you may notice throughout this tutorial, there are LOTS of different ways to go about accomplishing this effect - this is just the way I found to be most convenient.

Step 2 - Setting the Type

We’ll be setting the type in a not-so-traditional way, which will allow us to get a special layering.

Using the Type Tool, type whatever it is you’d like to apply the effect to, BUT only type one letter per layer. That is, you need to type a letter, apply the text, then create a new type layer with your next letter. When all is said and done, you should have a separate layer for each letter.

You’re image probably looks something like this (Quick Note: Type used below is Century Gothic):

Well, that leaves something to be left desired.

Rather than wasting too much time trying to get things aligned perfectly, let’s handle it all in a quick step. Select the Move Tool. Create a selection around the first letter (Ctrl + Click the Layer Thumbnail in the Layers Palette). Next, Select ALL of the Type Layers (Click the Bottom Type Layers name, hold shift, then click the top Type Layers name). Now, in the Options bar, Click “Align Bottom Edges” - the icon that looks like this

Deselect everything (Ctrl + D), and now start moving your individual letters so that they slightly overlap one another.

Positioned Type

Step 3 - Add a Gradient

Create a new Layer above your type layers. Using the Gradient Tool, and a White to Transparent gradient, fill in the work area so that the Gradient is not TOO OPAQUE, or TOO TRANSPARENT where it overlaps with the text, but fades nicely in that area. The gradient should move from top to bottom - Top being the most opaque (Hold Shift to make a perfectly straight gradient).

Step 4 - Cutting out Letters

Imagine that we’re making shaped-cookies. It’s a stretch, but stay with me. In a way, this gradient will serve as our ‘dough’, while the letters will be our ‘cookie cutters’. Those individual type layers created earlier are tools we can use to create shapes from the gradient.

Let’s go through it step by step and see if it makes more sense. Create a selection of the layer contents for your first letter (Ctrl + Click the Layer Thumbnail in the Layers Palette). Now, Select the Gradient Layer (By “Select”, I mean click the layer - do not select the layer contents. We want the selection of the first letter to remain). Copy (Ctrl + C) and Paste so that you’ve created a copy of the gradient in the shape of the letter. If you were to disable ALL of the layers except for this new layer you just created, and the background, you’d now have this:

It’s really a lot simpler than it sounds. Repeat this process for the rest of the letters, always making sure to selecting the gradient layer (the dough) prior to cutting out your layer. When you’re finished, put away all your letters and gradient layers (delete them, or hide them).

Step 5 - Just Add Color!

You may want to name all of your individual layers, that way you don’t lose track of which letter is which, but perhaps you’ve got a manageable number and that’s not necessary.

Create a new layer above all your ‘gradient-letters’. Grab the Paint Bucket Tool, and a bright color (I’m starting with #7fff5d). Create a selection of your first gradient-letter (Ignore any messages you may or may not see about no selection being shown), and fill in that selection with your selected color on the new layer. Set this layers Blending Mode to Screen.

Repeat this process for the remaining letters (each color on a new layer). Try using the same colors more than once every now and then.

Step 6 - Merge

When you’re sure that the type is set correctly, Merge all of your gradient-letters (Select the layers, then Ctrl + E). Then, Merge all of your colors into one layer (Make sure the blending mode is still set to screen).

You should now have two layers - one with the plain gradient layers, the other with the colors for the letters. We didn’t have to do this, it’s just easier to manage.

Step 7 - Getting the Glow

Duplicate your gradient-letters layer (Not the color layer). Apply a Gaussian Blur (See our Filters Tutorial) with value of 1-3 on this layer.

Repeat this step (Duplicate & Blur) on your Color layer. Set this layer to Lighten or Screen (use best judgment). Depending on the saturation and intensity of your colors, you may choose to duplicate the color layer a second time.

Step 8

Using the Eraser Tool, and a soft brush, go back and erase parts of the colored layers so that the type appears to fade from color to a ghostly white.

Step 9 - Reflect

Select ALL of the layers being used for the text effect, then Duplicate them. Merge the duplicated version into one layer. Use the trendy Surface Reflection Technique shown in our 5 Essential Reflections for Photoshop Tutorial to mirror your type.

Step 10 - Adjust as Needed!

From here on out, I’ll let you play on your own with the effect. I’d recommend playing with lighting effects in the background — simple things like adding some highlights behind the text… though you certainly could go all out as Drasik does in his work!

Here are some additional steps I took to improve upon the effect:

Playing with additional blurs can also add a bit of liveliness to the text. Try Duplicating a layer, and applying a motion blur to see how that works out for you!

Animated Gifs


This tutorial will demonstrate how you can create an Animated GIF logo. I used Corel DRAW! 7.0 for Windows for this technique. Some things may be done differently with other versions.
Putting a New Spin on Your Logo
I'll be the first to admit that I'm probably the last person to jump on the "Animated GIF" bandwagon. To be honest, I didn't really see the potential for animated GIFs. Most of the early images I saw were kind of cheesy. On top of that, I prefer keeping my images' download time to a minimum, and animated GIFs can get rather large very quickly.

Recently, though, I've seen the light. Done right, animated GIFs can be pretty cool. And, with today's GIF animation software, animated image file size can be kept quite reasonable. Animated GIFs can be real attention-getters on banner ads, can really add to the appeal of a static logo, and they can certainly add some pizzazz to a web page.

Animated 3D text has become so popular on the web, in fact, that there are now several dedicated programs available for you to choose from. These programs, produced by software companies such as Xara and Ulead, make the creation of animated 3D text as simple as point-and-click.

What if you need to do more than animate simple text? Normally you might think of resorting to a dedicated 3D-rendering program. These programs can be expensive, though, and they often have pretty steep learning curves. So what can you do? Well, you can use Corel DRAW! to create the frames for your animated masterpiece. That's right! Corel DRAW! has all the features necessary to help you create a 3D animated logo.

Here's how you can use the extrusion features to give depth to, light, and spin your creation...

Open a new graphic in Corel DRAW! (I'm using version 7, but the method should translate well to other versions).

I'll be creating a simple logo using the first letters of GrafX Design, my design company.

First I entered the text using the Text tool. I then selected the text by clicking on the Pick tool. This enabled me to change the font and the size of the text. I chose Braggadocio at 72 points.

Because I didn't want to create just simple text, but rather I wanted a logo, I decided to cut the text out of a simple oval shape. To do that, I selected the Ellipse tool and dragged an oval shape around the text.

To line these elements up, marquee-select them all with the Pick tool and choose Arrange, Align and Distribute. In the Align and distribute dialog box, check Center of Page and click OK.

With the elements still selected, click the Combine button on the property bar. This will combine, or cutout, the text from the oval.

You can change the color of the oval logo by left-clicking a color on the color palette. I choose a light blue color (see figure 9.1).

figure 9.1
figure 9.1


Now that the logo design is complete (as simple as it is), it's time to extrude the image, light it, and start creating the separate frames you'll need in order to complete the animation.

Choose Effects, Extrude to bring up the Extrude dialog box (see figure 9.2). This is where you'll do most of the work needed to create the frames of your spinning animation.

figure 9.2
figure 9.2


In this dialog box you'll see 5 tabs. The first three, Extrude, Rotate, and Lighting are the ones you'll need to use to create the frames for your animation.

The first thing you should do is extrude the logo. This process gives your logo some depth, i.e. it adds the 3rd dimension to your image.

Click on the first tab if it's not already active. You can now set the basic shape, viewpoint, and depth of your image. I set the shape to "Small Back," the viewpoint to "VP Locked To Object," and the depth to 2.0. You can play around with the various choices until you get the look you're after. When you're done, click Apply.

The next thing you will do is create the lighting.

Click the third tab. Turn on the first light by clicking the first lightbulb icon (or Light switch 1).

You can now position the light by dragging the small black icon around the 3D grid. You must place the icon on an intersection. I chose the upper-right corner. Once you've chosen the position for your light, click Apply.

At this point you won't really see much difference in your image. It's coming, though.

Click on the 2nd tab. This option enables you to rotate the logo in 3D space. You'll notice the Corel symbol that's visible in the middle of the dialog box (see figure 9.3).

figure 9.3
figure 9.3


This symbol can be dragged around with the mouse, and its position will correspond to the position of your image in 3D space once you click Apply. Changing the position in this manner is a lot of fun. However, you'll need to be more exacting when creating your frames. Below and to the right of the Corel symbol is a small, bent-cornered, rectangular icon. Clicking on this icon will replace the Corel symbol with a set of coordinates, or rotation values. The first controls the rotation about the x-axis, the second about the y-axis and the third about the z-axis. Because I'll be spinning my logo around the y-axis, I'll only need to change the values for number 2.

Before you start to apply the rotation values you should save the first frame. Obviously the first frame doesn't need to be rotated.

Before saving the first frame, though, create a white (or some other color, if you prefer) bounding box around your logo image. You'll need to do this because of the way Corel DRAW! saves an image. When Corel DRAW! saves an image it doesn't keep all of the white space you see around the onscreen representation. Instead, all of that white space is cropped off. It's best to have all of the frames of your animation the same size, and adding the bounding box will assure that this is the case.

Select the Rectangle tool and draw a box around your image. It doesn't have to be much bigger than the image but it should give you a little extra elbowroom.

On the color palette, left-click the color that you want the box to be. This hides your logo, of course. Press CTRL-Page Down until the box moves to the back and your logo is again visible.

To center everything again, marquee-select all of the objects and then select Arrange, Align and Distribute. Place a check mark in the Center of Page box and click OK.

To save the first frame of your animation, choose File, Export. In the Export dialog box, choose a folder in which to store the image, give your file a name, and choose a file type. I like to use the BMP file format, (because it's 24-bit and it's a format most animation programs recognize) and let the animation program handle the palette. I also like to name the frames in sequence. I started this sequence as GD00.BMP.

Click Export to bring up the Bitmap Export dialog box.

Set the colors to 16 Million Colors. Set the Size to Custom and place a checkmark in the Maintain Aspect Ratio box. You can leave the Resolution at anywhere from 72 dpi to 96 dpi because the animation is intended for screen viewing. I always like to set Anti-aliasing to Super-sampling. Once you have entered all of the settings, click OK to save the image.

Now you're ready to rotate the logo.

By adding the bounding box you de-selected the logo. Simply use the Pick tool to re-select the logo.

Back at the Extrude dialog box, click Edit and enter 10 in the 2nd spin control. Click Apply to apply the rotation. You could rotate the logo by a value of 1 rather than 10 each time, and this would result in an extremely smooth animation. However, it would also result in an unacceptably large final file size.

The 2nd frame (see figure 9.4) is ready to be saved. Not so bad, eh?

figure 9.4
figure 9.4


Choose File, Export and name the second frame. I named mine GD01.BMP. You'll need to select the Maintain Aspect Ratio and Super-sampling boxes again.

That completes the 2nd frame.

Back at the Export dialog box, click Edit and enter 20 in the 2nd spin control. Export this frame.

Continue on until you hit the value 70. You'll notice that the image is now at 90 degrees (see figure 9.5).

figure 9.5
figure 9.5


This occurs because Corel DRAW uses the values -100 to 100 for the rotation values and not, as you might expect, 0-360 degrees.

After saving the frame with the value at 70, start back down using negative values. Start with -60, then -50, etc, until you hit -10. Although, technically, using these values won't spin the logo so that you see the back of it, using these numbers will give your animation the appearance of spinning 360 degrees around the y-axis.

You should now have 14 frames numbering 00 through 13. You're ready to animate your logo!

It's time to fire up your animation program. I'm currently using Ulead's GIF Animator. I like it because it's relatively easy to use-it offers animation and optimization wizards, has good palette control, and accepts a fairly wide range of file formats.

After opening GIF Animator, I created the final animation, which can be seen below. Because the wizards work so well, I simply chose to use all of the defaults.

When the animation program opens, it offers you a chance to use the Animation Wizard. This wizard enables you to Add Images/Videos. From this first dialog box, you can add the images, or frames of your animation. Simply point to the folder where you stored the separate frames. There's a small quirk, though. The frames will not be in sequence unless you follow this simple rule: Choose the last file in the sequence and then, while holding down the shift key, click on the first filename in the sequence. Click OPEN. You can click through the remaining choices by choosing Next each time. The one place you might want to stray from the default is the Frame Duration. I like my animations to run more quickly than the default and usually choose 10/100's of a second rather than the 25/100's. In the last dialog box, choose Finish to close the wizard.

To see how your animation will appear, click on the Start Preview button. You'll see your animation for the first time. Pretty cool, eh?

If everything looks okay, you can choose File, Optimization Wizard. Again, you should be able to just let the wizard do its thing. My final, optimized, spinning logo weighs in at a pretty good 11K. If you're not happy with the final result, re-run the wizard and tweak some of the settings. Some of the biggest savings can be achieved by lowering the color depth. I saved the logo with 64 colors, but I probably could have gone lower without sacrificing too much of the image's quality. You should spend a little time getting to know the animation software. Most of the packages I've tried are fairly easy to use and come with pretty extensive online help.

That's it. I invite you to play around with some text and some different shapes in Corel DRAW!. Try adding a bevel (use the last tab in the Extrude dialog box), or adding a second and third light, etc. Extrude your images to different depths and try filling them with textures as well as solid colors. Pretty soon you'll be wowing the visitors at your web site with all manner of spinning and moving logos and buttons.

figure 9.6
figure 9.6

Coffee Cup Animation


This is an easy animation you can do with CorelDRAW®. This tutorial uses CorelDRAW 8 or 9 to create the frames and Adobe® ImageReady™ to animate them. For those who don't have ImageReady, you can use any other animation program to make the animated GIF (click here for Royal E. Frazier's software page). For this tutorial, you also need the clip art image COFFEET.CDR (in the Food/Drinks folder of the CorelDRAW 8 or 9 clipart collection) or COFFEET.CCX (in the Food4 folder of the ccx clipart in one of the Corel Gallery collections available commercially). You can probably find this image in most any Corel clipart collection or substitute one of your own.

1. First, startup CorelDRAW and open the file. Next, click the "Landscape" button on the toolbar to switch the page orientation. This will give us enough room to make the frames.

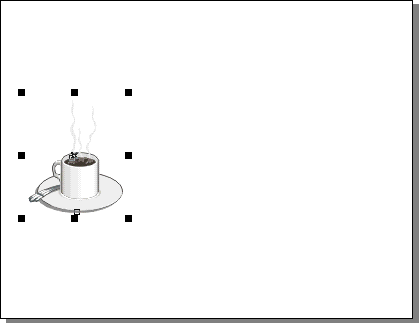
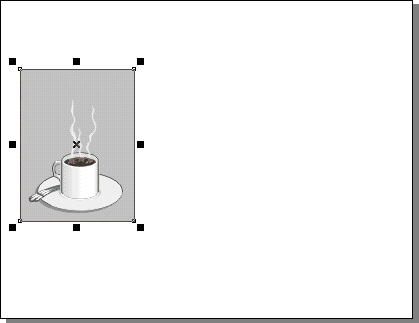
2. Select the object group and drag it to the left of the page.

3. Your workspace should look something like the one below.

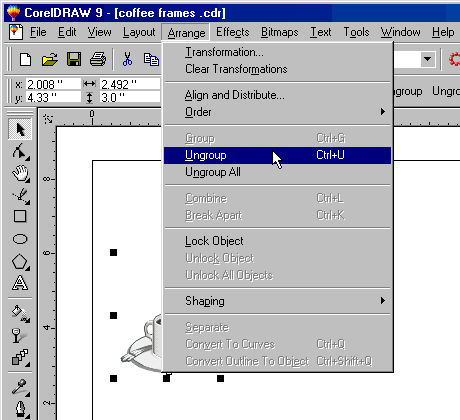
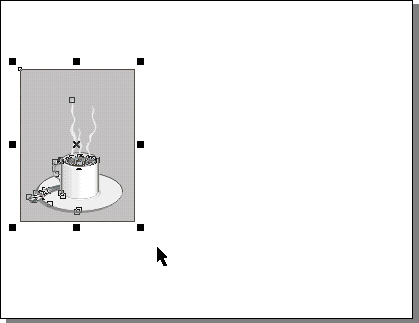
4. We need to modify some of the objects so while the group is still selected, click Arrange > Ungroup.

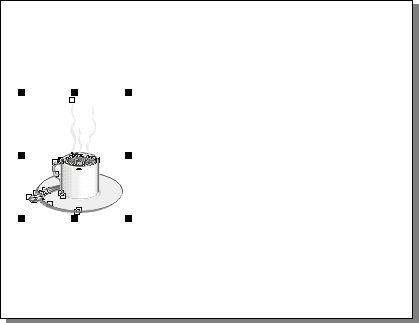
5. Now the drawing will appear as separate objects.

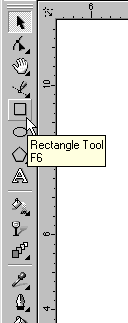
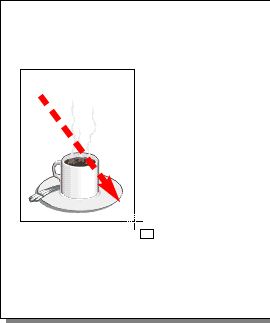
6. Next, click the Rectangle Tool and drag a rectangle around the coffee cup. This will provide a common frame of reference for each frame so they will align with each other when they are assembled.


Tip: Creating a rectangle as a common frame of reference for each image is a standard way to make frames for animations. Do this whether you keep the rectangle in the finished animation or get rid of it by cropping it out.

7. The rectangle will still be selected after you draw it.


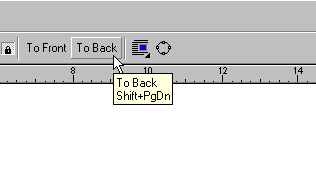
8. Click the "To Back" button on the toolbar to send it to the back of the stack, then click a color button to give it a fill. In this case I used 20% black for the fill.


Tip: If you want a transparent background for the finished animation, then set the background color to be the same as the background color over which it will be displayed. Then export each frame as a GIF image and select "Anti-aliasing" in the Bitmap Export dialog. You will see another dialog where you can set the background color to be transparent. This will provide a matte color which will blend the anti-aliased pixels into the background perfectly.

9. Your workspace should look something like the one below.

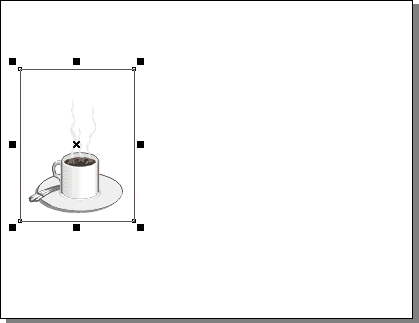
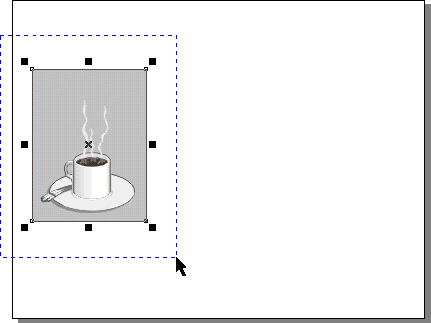
10. You are now ready to export the first frame image. Using the Pick Tool, marquee-select the frame.

11. With the first frame selected, your workspace should look something like the one below.

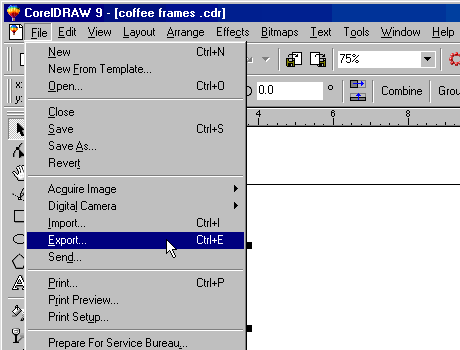
12. Next, click File > Export... to export the frame as an image.

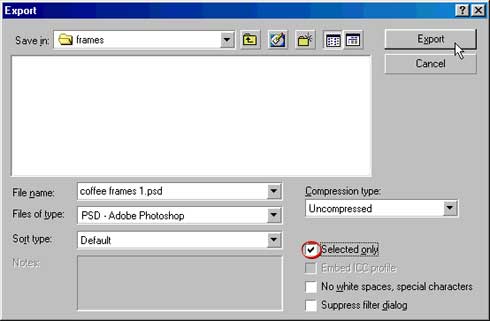
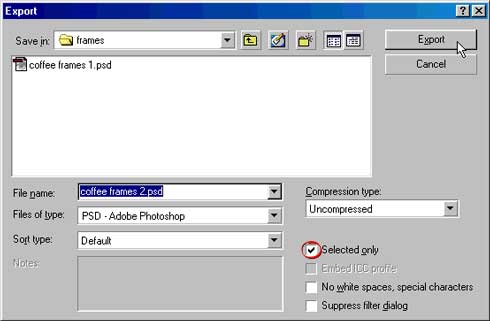
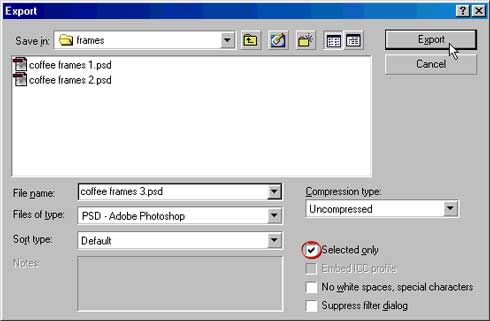
13. In the Export dialog, choose the "Selected Only" check box. This will export only the selected objects as an image. Use a True Color file format. In this case I am using the Photoshop PSD file format. Give it a filename and click "Export". Save all the frame images in the same folder.


Tip: Name the sequence of frame images with the same file name ending with 1, 2, 3, etc. Many animation programs recognize files named this way as an image sequence. You can take advantage of this and load the whole frame sequence at once.


Note: You don't have to save images in Photoshop format. This format is just my personal preference. You can choose any of the other true color raster formats such as TIFF or PICT or BMP. Just don't use a lossy format such as JPEG or a format that isn't true color like GIF (more here on color depth and true color). The reason is that when the finished animated GIF is created the color depth will be reduced to a maximum of 256 colors. You don't want to start with a limited palette. Rather, you want all the colors available before the GIF animation is generated.

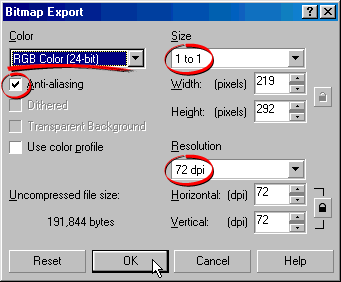
14. Next, you will see a dialog. Use the following settings circled or underlined in the graphic below:

RGB Color
Anti-aliasing
1 to 1 Size
72 dpi resolution

We want RGB color (24-bit True Color). The GIF file format only supports a maximum of 256 colors more here on True Color and the GIF file format. If you save the frames as individual GIF images, each will have a different palette and and there may be flickering between the frames because of the different colors. By saving the frames in True Color, the animation program will generate a common palette for all the frames. Alternately, you can export frames as GIF images if you want a transparent background. You just need to be aware that there is a tradeoff between color depth and transparency.

Anti-aliasing will give the images a smooth appearance. Otherwise the images will appear jagged more here on anti-aliasing.

Choose a 1 to 1 size. If you want the finished animation to be smaller or larger, then adjust this amount.

Since the finished animation is for a screen display, choose 72 dpi for the resolution more here on resolution.

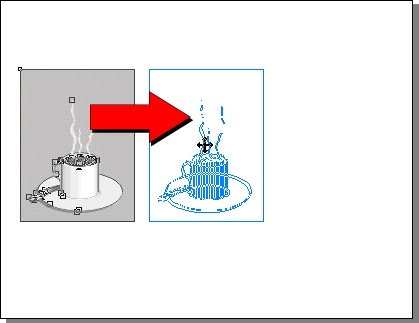
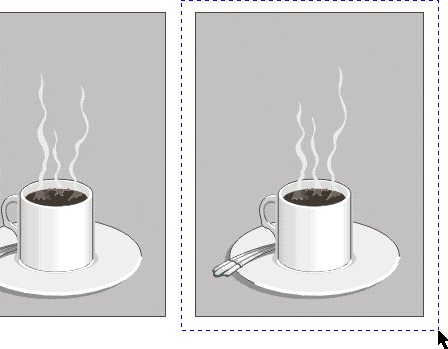
15. Next, we want to duplicate the frame. Click Ctrl-D or Edit > Copy followed by Edit > Paste, then drag the duplicate to the right of the first frame.

16. The duplicated frame appears to the right of the first one.


Tip: This is the best way to animate frames in a vector graphics application such as CorelDRAW®, Deneba Canvas™, Adobe® Illustrator® or Macromedia® FreeHand®. By duplicating the previous frame, you can make small changes to the vector objects and achieve a smooth animation.

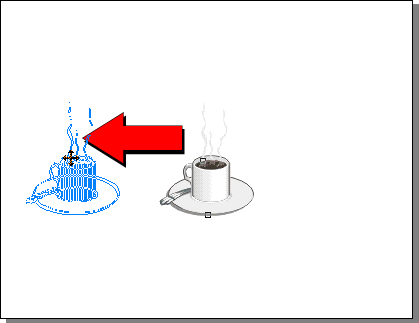
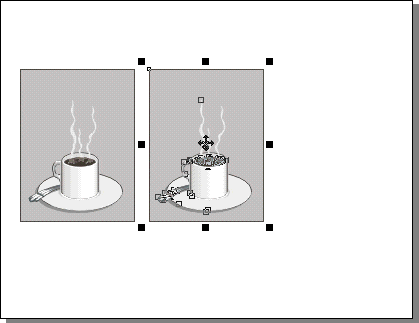
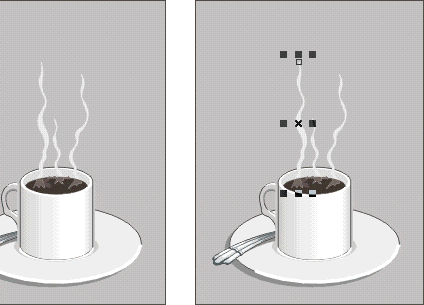
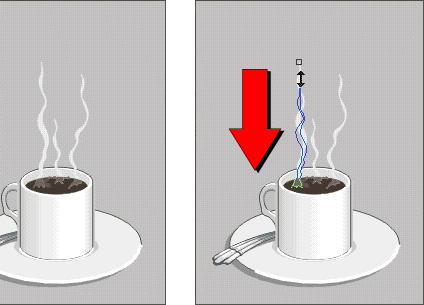
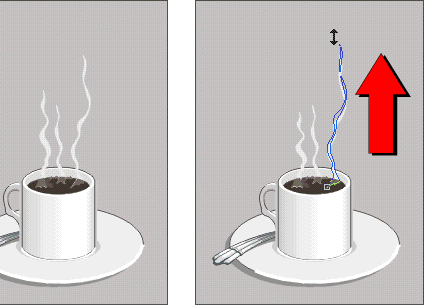
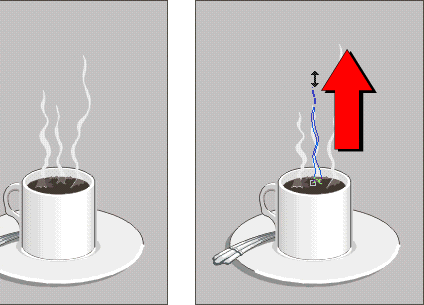
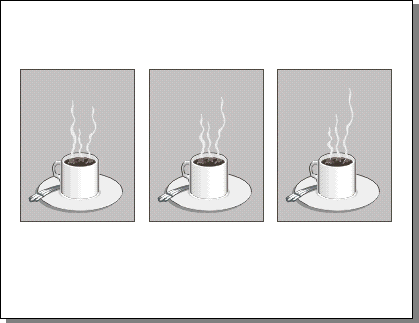
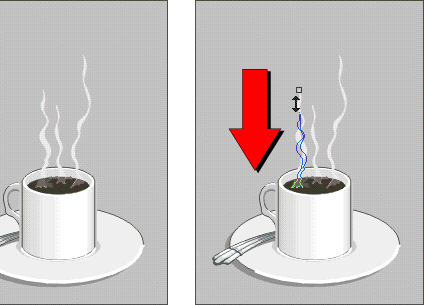
17. In this frame we will modify the steam objects. There are 3 columns of steam (left, center and right). We are going to make the left one fall, and make the center and right ones rise. Start by selecting the left steam column.

18. Using the Pick Tool, grab the top center handle and drag downwards slightly.


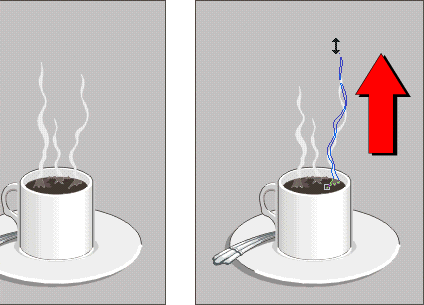
19. Select the right steam column and drag upwards slightly.

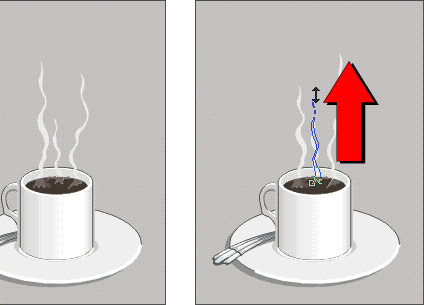
20. Then select the center steam column and drag upwards slightly.

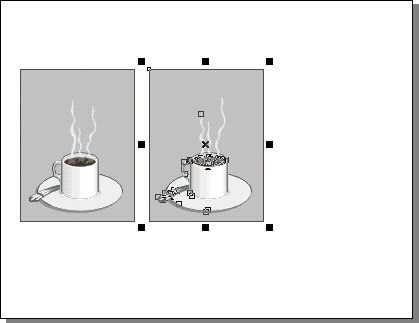
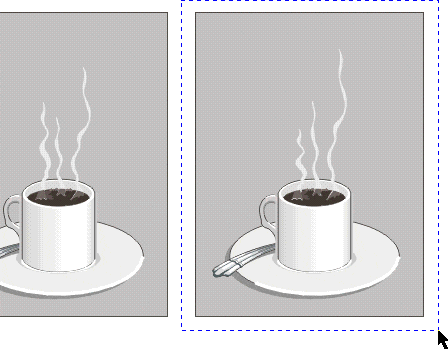
21. You are now ready to export the second frame. Using the Pick Tool, marquee-select the frame.

22. The selected frame should appear like the one below.


23. Export the frame using the same settings as in a previous step. Give it the same filename as the one before ending it with a "2" instead. Make sure to choose "Selected Only" (circled below) just like before.

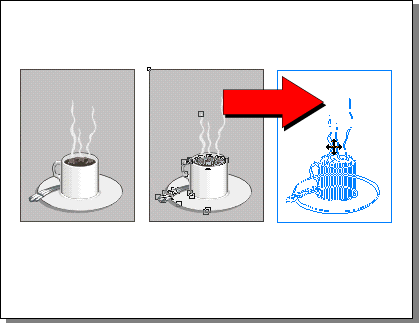
24. Duplicate the frame using Ctrl-D or Edit > Copy followed by Edit > Paste, then drag the duplicate to the right of the second frame.

25. Select the left steam column and drag it downwards slightly.

26. Select the right steam column and drag it upwards slightly.


27. Select the center steam column and drag it upwards slightly.

28. Marquee-select the frame with the Pick Tool.

29. Once again, export the frame using the same settings as before. Give it the same filename as the two previous ones and end it with a "3". Remember to choose "Selected Only" (circled below).

30. Below is a shot of the document with the three frames. You should save the document and quit CorelDRAW®.


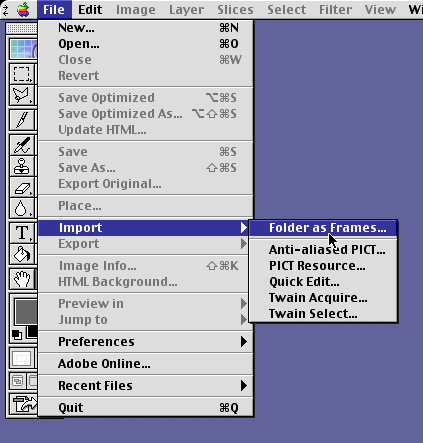
31. Launch Adobe® ImageReady™ and click File > Import > Folder as Frames.

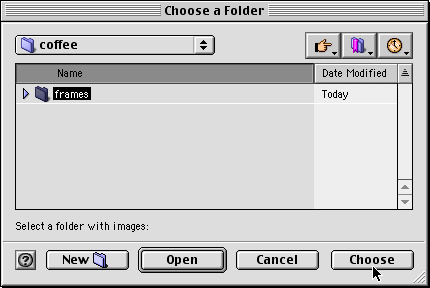
32. Navigate to the folder containing the frames and click "Choose" on the Mac®...

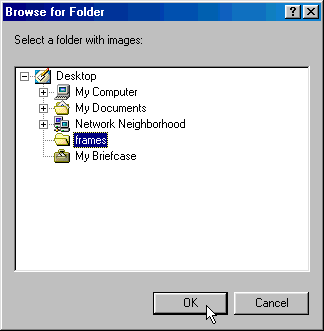
or "OK" on a Windows® system.


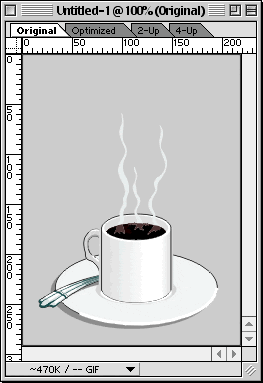
33. You will see the first frame in the document window.

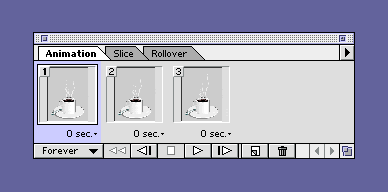
34. The Animation palette will display the 3 frames.

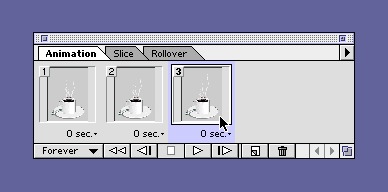
35. Click on frame 3 in the Animation palette.

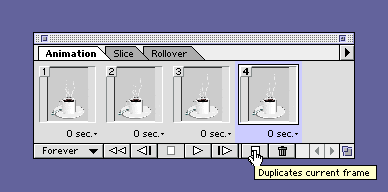
36. Click the "Duplicate Frame" button. This will add a 4th frame that is a duplicate of frame 3.

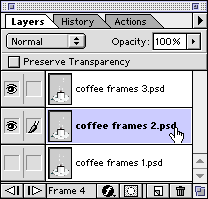
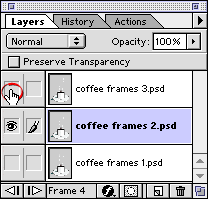
37. Then in the Layers palette, click layer 2 to make it visible (below left), then click the visibility icon on layer 3 (below right) to hide it. This makes layer 2 visible in frame 4.

Note: Alternately, you could have duplicated frame 2 and dragged it to the right in the Animation palette.

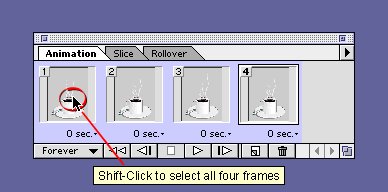
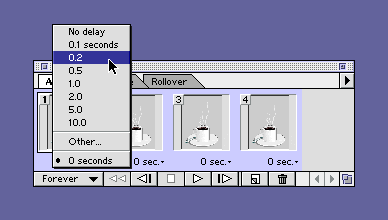
38. The default timing for imported frames is zero seconds delay. You can adjust the timing on all the frames at once. Frame 4 is still selected. Shift-Click frame 1 to select all four frames.

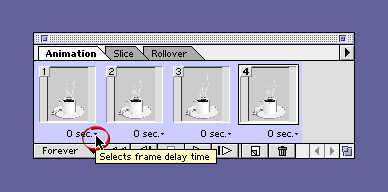
39. Click the small triangle to the right of the words "0 sec." under one of the frames.

40. This brings up the Frame Delay menu. In this case choose .2 seconds.

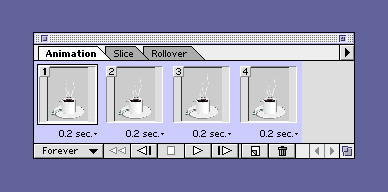
41. Notice now that all the frames are set to .2 seconds delay (5 frames per second).

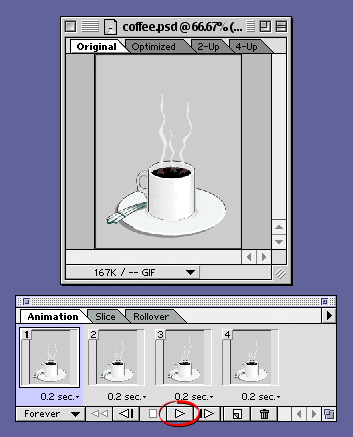
42. Click the play button (circled below) on the Animation palette to preview the animation.

Click here for
the animated
version of
this image

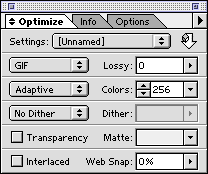
43. Now we are ready to export the animated GIF file. Setup the Optimize palette with these settings:

GIF
Adaptive
No Dither
GIF89a file format
Uses an adaptive palette
No dithering of colors

The example below is set for 256 colors. You can make a smaller file by selecting fewer colors for the palette.

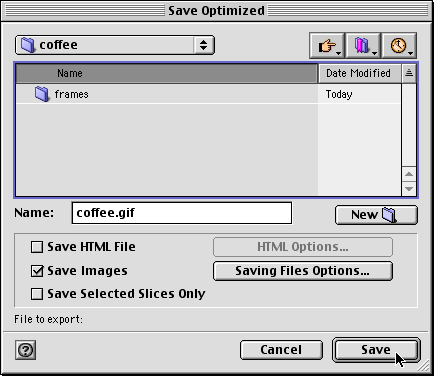
44. Next click File > Save Optimized As... and in the following dialog provide a file name.

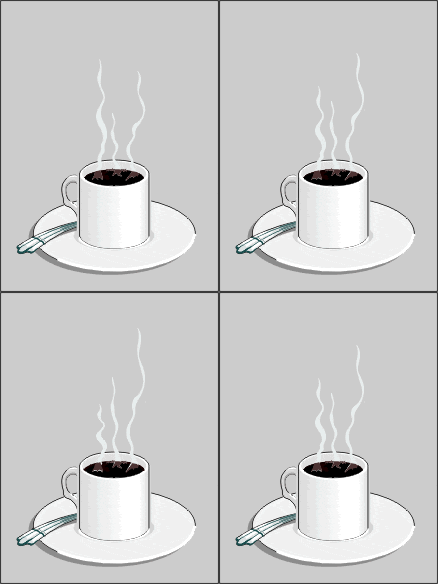
45. Here's the finished animation.

reference : sketchpad